We’ve come up with a comprehensive guide featuring our favorite at-home beauty tips and tricks. These are simple and straightforward things you can do while you’re stuck inside, like safely removing lash extensions, and toning brassy hair. We’ve also included our favorite products that will help get you through this quarantine, like the ideal root touch up, our go-to self-tanner, and a lash perm kit.
Touching Up Your Roots
It’s been over a month now, so those dreaded roots are most likely growing in full force (and that’s okay). However, If you make the decision to touch up any regrowth, there are some at-home products that can help. If you want to maintain the integrity of your hair, avoid any drug-store box bleach products.
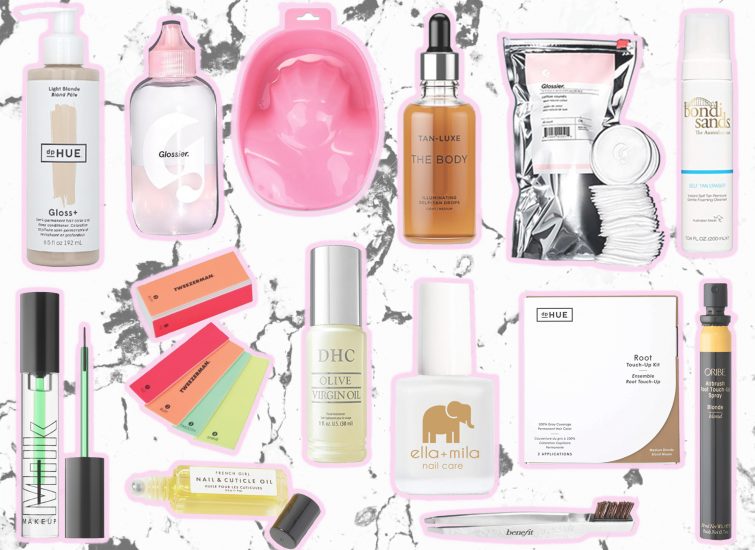
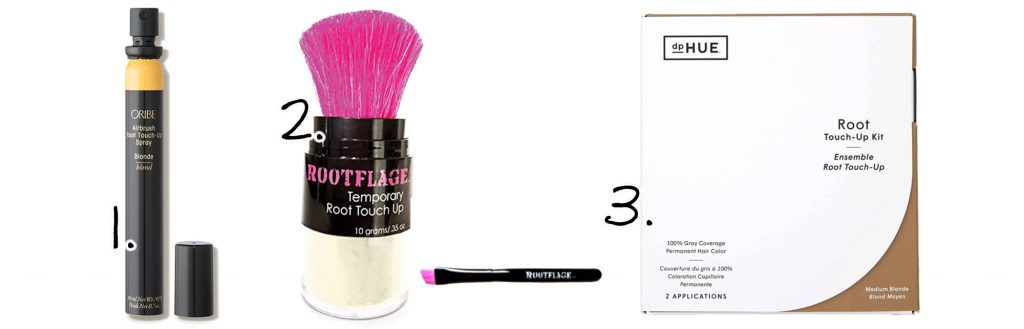
For the quickest way to cover up new hair growth: Oribe’s Airbrush Root Touch-Up Spray which comes in five shades (platinum, light brown, blonde, black, and dark brown). It’s made with a quick-drying powder formula to cover-up roots while also absorbing oils, making the product efficient and easy to use. The formula also includes mineral colorants, rice starch, and a UV absorber which will help intercept your color from fading as quickly as it usually does.
Another root touchup option: Rootflage Instant Touch-up Powder. This product will help to blend your roots with your hair color. It takes 30 seconds to apply, and it doubles as a dry shampoo. It comes in 16 colors ranging from blondes to browns to reds. Each brush comes with about 60 uses so it will most likely last you the entire quarantine.
For touching up grays: the dpHUE Root Touch-up Kit is designed to blend your natural roots to your current hair color. This permanent, salon-quality cream color comes with two applications per kit and in a variety of shades. It has everything you will need for your at-home root touch-up (color cream, color activation developer, gloves, mixing bowls, processing caps, a reusable applicator brush, and color care shampoo and conditioner packets). Best of all, it only takes about an hour and will refresh your hair until you can see your stylist.
Dull and Fading Highlights That Need a Boost

Much like touching up our roots, color-treated hair and highlights need a boost. An amazing product for this is dpHUE’s Color Boosting Gloss + Deep Conditioning Treatment (which I need to get my hands on ASAP!). It comes in a range of colors from platinum blonde to black and each shade has a different purpose. For example, light blonde adds blonde tones and shine, while making hair more radiant and lifting highlights.
There is also Gloss+ Sheer which adds shine and softness, and you can mix this one with other shades to create your own, personalized Gloss+ shade. This product works by staining your hair with pigment to enhance your current color. With semi-permanent results, you can use it when your color has faded or when your highlights need toning. It’s perfect for lock-down because it contains no harmful ingredients and it can be used as often as desired with no destruction to your hair. Pro-Tip: The shades can be used with dpHUE Permanent Root Touch-Up Kit.
Brassy Hair Beauty Fix
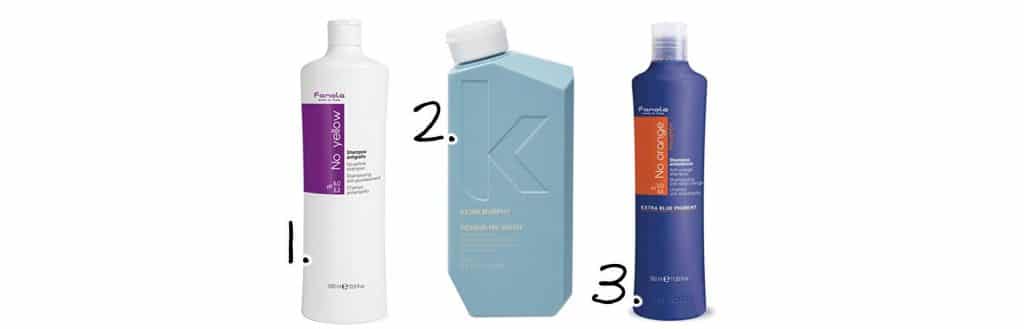
Brassy hair is something a lot of people can relate to and Fanola’s No Yellow Shampoo is ideal for blondes. It deposits violet pigments to tone down unwanted yellow hues, keeping your color vivid and even throughout. Kristie swears by this product to remove the yellowish tones in her blonde hair. She uses the shampoo once or twice a week for up-keep and mixes a quarter size in with her regular shampoo (her go-to is Kevin Murphy Repair Me Wash). This is because it can cause grayish/violet hues to your hair if used at full strength. She then lets it sit in her hair for about 10 minutes. If she hasn’t used it for quite some time and her hair gets super-brassy, she uses this by itself but rinses it out immediately. There’s a version designed to remove orange undertones (which often happens to brunettes), and that’s Fanola’s No Orange Shampoo. It’s similar to the purple but this one is made up of blue pigment.
An Easy DIY Manicure
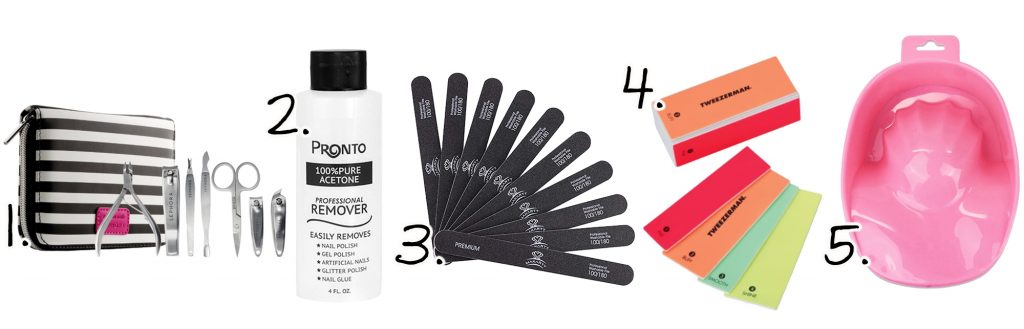
1. 2. 3. 4. 5. 6. 7. 8. 9. 10.
Here’s a quick and straightforward guide on how to do an at-home manicure. PS: this kit comes with almost everything you need to create salon-like nails.
- Prep your nails: The first step to a perfect mani is to prep your nails. Start by removing old polish, if applicable. If not, you will still want to run a cotton ball of nail polish remover over each nail to get rid of any dirt and oil. Afterward, wash your hands with warm soapy water.
- Clip, file, and buff: Start by clipping your nails to your desired length and use the angled clipper to clip the tougher areas. Then file gently by moving in one direction to get your tips into your desired shape. Start at one edge and work your way over to the other. For a more square shape, file each nail flat across the top and soften the edges slightly. For a rounded look, file the tips into a curve. Next, use a nail buffer to smooth out the tops and sides of your nails.
- Soak hands for 2 minutes: Take a bowl of warm water with a few drops of soap and soak your fingers for 2 minutes to clean under your fingernails. Dry your nails after.
- Prepare your cuticles: Apply a cuticle cream. Using a cuticle pusher, gently push back the cuticles to merge with the skin of your fingers. Do not force them back. Wipe off the excess cream. Take your cuticle cutter and run the blade gently along the length of your cuticles to cut them off.
- Apply rubbing alcohol: Dip a piece of paper towel in rubbing alcohol and press on each nail; this will make the polish last longer.
- Add a base coat: Cover each nail with one layer of clear base coat which will even out ridges and serve as a polish primer. Let the coat dry completely. (You can use a quick drying solution to save on time)
- Polish your nails: I love the Champagne Shine duo from Nails Inc. You can use the colors alone or both of them together with the shimmery shade on top. Start by painting a thin coat, removing excess polish from the brush first. Slowly paint a vertical stripe down the center of your nail, followed by another stripe on either side. Try to paint all the way to the edge, but be sure to leave a small margin, rather than painting the skin on the side. Angle the brush forward, press gently so the bristles spread out a little, and drag it gently across the nail.
- Let your nails dry: Wait about 2 minutes if you’re using a quick drying solution, or 10 to 15 minutes if you’re letting them dry naturally. Once the first coat has dried, apply a second coat to enhance the color.
- Apply your top coat: Finish with a clear top coat for a hard, smooth, shiny, and chip-resistant shield. Let it dry completely.
- Clean around the edges: Using a precision tip Q-Tip dipped in nail polish remover, rub it slowly along the cuticle of your nails to remove any mistakes.
- Apply cuticle oil: The last step for the perfect at-home manicure is to apply cuticle oil. You’re all set to Insta-story your DIY mani!
Grooming Your Brows Like A Pro
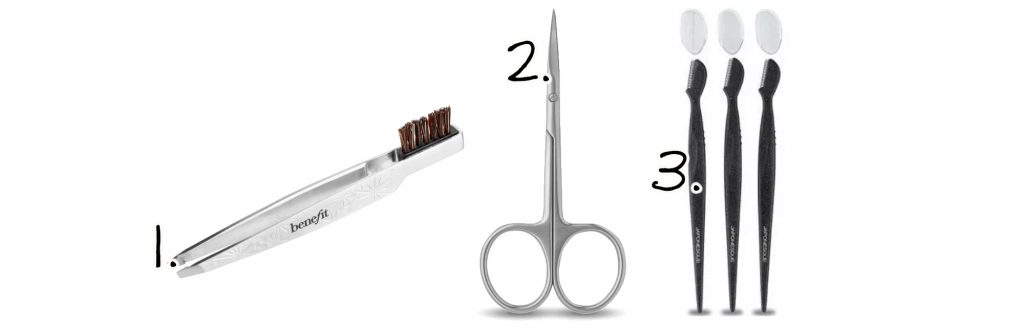
Now that it’s no longer an option to have your eyebrows groomed professionally, you can do them like a pro in just three simple steps. (Here’s my go-to tutorial that breaks it down.
- Tweeze: Using your tweezer and spooly brush (this 2-in-1 tool from Benefit is only $20), first start by brushing your hairs upward. Then having the shape you want in mind, tweeze all the excess hairs underneath. (Be careful to not over-tweeze; always check in the mirror from far away to see how they’re looking.) Next, brush the hair downwards. Start tweezing all excess hairs above the brow for the shape you want to gain. Remember to pluck in the direction the hair grows for less pain.
- Trim – Start by brushing your brows upwards again to find the longer hairs. Then using sheers, carefully trim the tops of the hairs to create a sharp look. (This also makes it easier to fill in your brows later.) Do the same thing after brushing the brows downwards by cutting off the bottoms of the hairs.
- Shave – This is an optional step but helps for cleaning up and making them look neat. Utilizing an eyebrow razor, start shaving at an angle in a downward motion to remove all remaining hairs. (Be careful not to cut yourself or your brow hairs.) Finish by brushing all the hairs in place and tweeze any uneven hairs.
Removing Faux Lashes
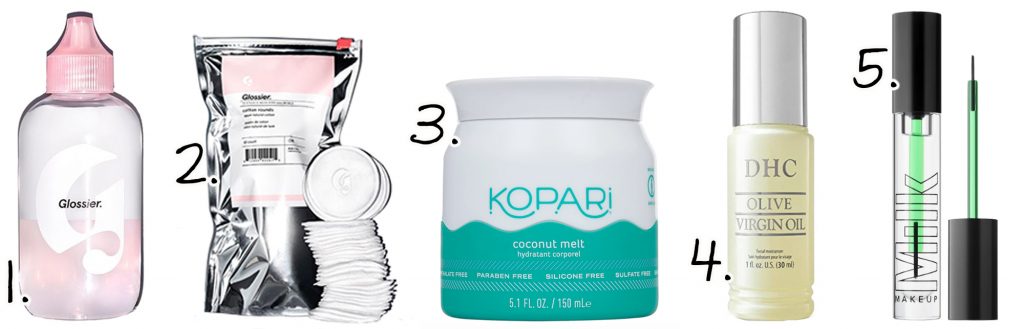
If you just got your lash extensions before going into quarantine, you’re probably wondering how to remove them without damaging your natural lashes. Usually, they’re refilled every two to three weeks to keep shedding at a minimum. However, when you can’t get them done, the extensions will eventually fall off on their own. After this, you might still be left with a few stragglers.
For removing the few left-over hairs at home, follow these three easy beauty trick steps:
- Loosen the glue: Use a waterproof makeup remover to clean away any makeup or glue.
- Steam your face: This is the most important part for removal. Fill a bowl with steaming water to help soften the glue. Cover your head with a towel and lean over the bowl for 15 minutes.
- Apply oil: Dip a cotton pad in coconut, olive, or baby oil. Swipe it gently across your lash line until the extensions loosen and fall off.
After removing those pesky lash extensions it’s best to use a serum to keep your lashes strong and healthy. (What better time to strengthen them than when you’re stuck indoors?) The Milk Makeup KUSH Growhouse Lash + Brow Serum is my favorite. It’s a daily serum that’s purpose is to regrow your brows and your lashes, giving them a lengthier and more volumized look. The product contains hemp-derived cannabis seed extract to hydrate, plant peptides to thicken the appearance, and quinoa to guide hair follicles to a healthier state. To use, swipe a single stroke of the brush along your upper and lower lash lines and your brows. Allow the formula one to two minutes to dry. You can use the serum in the morning and at night. Results will start after about a month and bring a transformed look after 12 weeks.
An At-Home Eyelash Lift
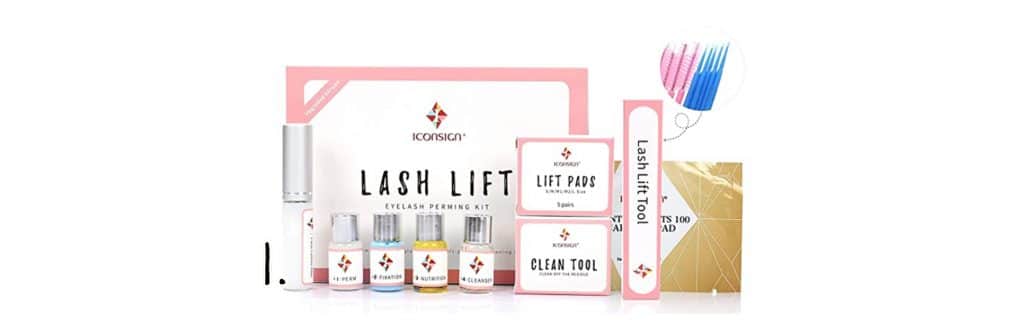
1.
Speaking of lashes, this at-home perm kit will give your lashes a professional-quality lift and semi-permanent curl and it will last about a month. This ensures you don’t have to curl your lashes every day or get lash extensions (which can both lead to breakage). It includes everything you need for your lash lift: glue, pads, perm lotion, fixing agent, nutrition lotion, and a cleanser. Within an hour, your lashes will look fuller and more dramatic.
The Best Way To Apply Self-Tanner
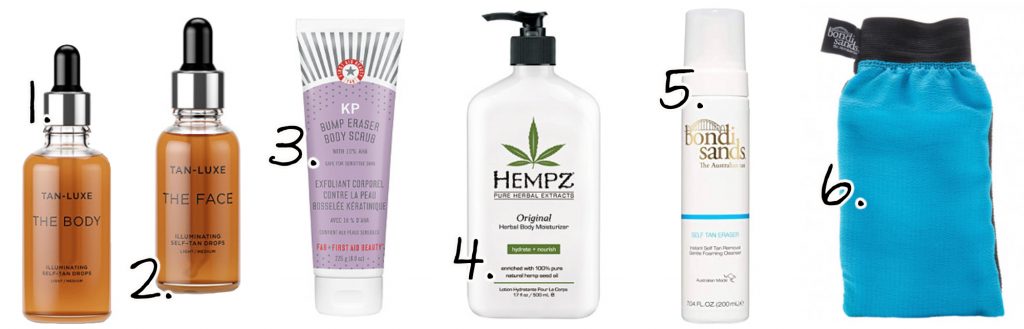
Self-tanning is one of my favorite at-home beauty tricks because it can be so easy to do. However, there are so many products on the market from horrible to amazing that it’s important to find the right one, and one that’s ideal for your skintone.
For a while now mine and Kristie’ go-to tanning product has been Tan-Luxe The Body Illuminating Self-Tan Drops. It comes in two shades, light/medium, and medium/dark making it ideal for every skin tone. What I love about this one is how you control the amount of color you want and your tan develops over a few hours, giving a flawless and undetectable look without color run-off. The exceptional part of this product is just how easy it is to use. To prep, you want to exfoliate while in the shower. To apply, make sure your skin is completely dried off. In a cup mix, 2-6 tan drops with your body moisturizer. I like to use latex gloves and I’ll apply it to the top of my hands last. More drops will add an extra depth of color, so it’s better to start off on the lower end until you see how it looks on your skin tone. You want to administer it to dry skin in large circular motions from toe to neck. Once you’re finished you can let it air dry or use a blow dryer on cool to speed up the process. To maintain your tan, use the product a few times a week and be sure to gently exfoliate and moisturize. Tan-Luxe also has vitamin-enriched glow drops designed to give your face that I just got back from a tropical vacation glow.
In the off chance you do make a mistake when applying self-tanner, having a bottle of Bondi Sands Self-Tan Eraser on hand is essential. Lacking harmful ingredients it erases streaks in only 5 minutes. This eraser has a unique cleansing formula made with aloe vera that moisturizes and leaves your skin smooth. The directions say it works best on dry skin and to use after at least 3 days of applying your self-tanner. However, I use it to correct any mistakes I may have made and I use it a few hours after applying self-tanner or the following morning. I’ll leave the eraser on my skin for 5-10 minutes, then I’ll shower and use my mitt to wipe away the tan.
*This article contains some affiliate links.